
It is closing in on midterms and I am once again urging my students to utilize the time honoured tradition of "old school" techniques for studying. To this end, nothing beats a well crafted deck of flashcards. Remember those? You were probably first introduced to them in kindergarten when learning the alphabet or later in grade school when mastering simple arithmetic and multiplication tables. On the one side, a question or problem or image, and on the other, the solution or description to memorize.
When it comes to art history, students are often intimidated with the vast array of visual images that they are assigned to study for exams. The typical first or second year art history exam involves studying many dozens of art objects and being shown a small selection of these images projected on a screen for a set amount of time with the instructions to identify the artist, title, and date and answer a specific question related to the art work's form, content and/or context. While this may sound daunting, what I remind students of is that art history exams are among the only kind of test that provide the luxury of placing the "answer" as it were right in front of them. In other words, even if you cannot identify all of the art work's constituent elements, there is always the possibility of drawing from what you see, or being reminded by association what the answer to the question could be. This is especially true if you are a visual learner.
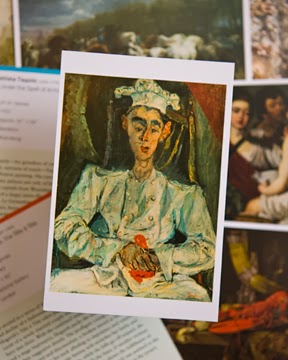
Enter the flashcard. At its simplest level, the flashcard is useful to help associate all of the relevant information gathered via lecture, textbook, and outside reference material into one focused place related to any individual art work. In the flashcard sets I used to make in university, I would glue a colour copy of any art work I was studying, while on the back, I would categorize the information I was studying into three categories based on
1) FORM: All of the details related to the medium, composition, scale, and description of the art work independent of meaning.
2) CONTENT: The subject matter and story or implied meaning of the art work that is derived by simply assessing the work without knowledge of any additional historical information-- the "what you see is what you get" kind of thing related to the themes and ideas represented in the art work.
3) CONTEXT: This is the largest category of information that includes all of the relevant circumstances in which the art work was produced and circulated. To avoid getting overloaded with too many details, here is where I tell students to isolate those aspects of history, theory, and artist details that the professor focuses on in their lecture first, and then add in any additional information provided in the textbook that helps extend those observations afterwards. Remember that most professors will draw midterm questions directly from their own lecture notes, and/or focus on themes and ideas that were being discussed more broadly when the individual art object made its appearance in the lecture. This is why it is always a good idea to take lecture notes that tie big ideas and themes to specific art works under discussion.
Now, you can make these flashcards the old fashioned way using index cards, colour photocopies, scissors, glue and pen, or you can check out some of these techie methods listed below to produce digital flashcards, saving trees and maybe a bit of time (depending on whether you have digital notes and images handy). Either way, the creation of the flashcards is as important as the actual studying you will be doing with them later. Here are some free flashcard applications and software to check out that either I have used or have been used by my students:
- Flashcard Machine: This is one of the older of the applications, created by a BFA student who wanted to create a simple way to produce flashcards using digital means. It is very simple to use, but does require you to upload images to a database before using.
- Fauxflash: A simple, quick and easy set up for creating on-line flashcards. This site makes them public, so that you can share your flashcards and/or collaborate with friends, but you can also "hide" them by simply forgoing the addition of a category or easy to search title for your deck.
- Evernote Peek: For iPad users, this application works with your tablet cover to help create a desk top flashcard that shows you snippets of information that prompt you to figure out the information or image being memorized. This one requires a bit more set up, but it is private and can be more customized for those concerned with design.
- ProProfs Flashcards: this application is one that many of my students have used and allows users to create and share flashcards as a group over social media, making that art history scene in Social Network come to life in new ways!
The fun part begins after the flashcards are made. Enlist your friends, family, and loved ones (you know, the ones who keep asking you what you are up to in school) and have them test you with the cards. It is a proven fact that the best way to learn about a subject is to teach it to someone else, so it is great to use the flashcards with someone who knows little about your subject area. Their natural curiosity and questions will help draw out important information from you and put you in the position of "expert." You will also likely remember these bits of conversation when the image appears as if magic on the screen during an exam. And even if you cannot recall every detail, chances are you will remember enough information about the art work to provide a decent answer. Good luck studying!